Showing posts with label Simulations of Air Warfare. Show all posts

Sunday, January 9, 2011

DCS: A-10C Warthog - 210 KIAS, A Speed to Remember


Volume 3 of the Multi-Command Instruction 11-A/OA10 says the following in Chapter 6 (air-to-surface weapons employment):
If airspeed decreases below 210 KIAS in a pop-up attack, abort the maneuver. Base this airspeed on typical training weights and configurations. At heavy gross weight, adjust abort speed upward to provide sufficient G and turning room to recover from an adverse flight condition.

We all know that flying too slow during an attack run is a recipe for disaster, but why 210 KIAS?

I don't know if you have noticed the yellow tick mark in your airspeed indicator of your virtual A-10C, it's at 210 KIAS ...


210 KIAS is not a stall speed. I have been able to fly the A-10 at speeds well below that if I trim the aircraft accordingly.

Let's take a look at the sustained turn rate performance chart of the A-10. This chart is actually is for the A-10A.
To extract information from these type of charts is a bit convoluted, so bear with me for a little while.

Let's say we are flying at 250 KIAS. To know how many Gs we can pull in a sustained turn we start in the x-axis of the graph of the left (I marked this example as A1) and we go up until intersecting the barometric/pressure altitude (sea level, SL in this case) and then we trace a horizontal line from that intersection until we reach the line that corresponds with the weight of the aircraft (35,000 pounds in this example). From that point we trace a vertical line towards the x-axis of the graph in the right. We can have a sustained turn at approximately 3.1 Gs at sea level when we our bird weights 35,000 pounds and we start the turn at 250 KIAs.

Let's suppose that because of bad turning or other unfortunate circumstances of the mission, we lost 25 KIAs and we now start a second turn at 225 KIAS. From the curve above (follow the A2 traced path), we know that we would be able to pull 2.9 Gs at this second turn. Not a catastrophic loss of turning capability overall.

Now, let's imagine that we start a turn at 200 KIAS. Following the trace labeled B1 in the plot above, we predict being able to pull around 2.75 Gs. In the same way as above, by means of bad turning or something else we loose 25 KIAS and go down to 175 KIAS, our second sustained turn will be pulling only 2.1 Gs (trace B2 above)..

In summary:

  • Pilot A starts a first turn at 275 KIAS and will be able to pull 3.1 Gs in a sustained turn (trace A1). Some time later pilot A starts a second turn at 250 KIAS and will be able to pull 2.9 Gs in a sustained turn (trace A2). Between the two turns, pilot A lost 25 KIAS that translated in the loss of 0.2 Gs for the next sustained turn.
  • Pilot B starts a first turn at 200 KIAS and will be able to pull 2.75 Gs in a sustained turn (trace B1). Some time later pilot B starts a second turn at 175 KIAS and will be able to pull 2.1 Gs in a sustained turn (trace B2). Between the two turns, pilot B lost 25 KIAS that translated in the loss of 0.65 Gs for the next sustained turn.


If you are good with graphs you will notice that the curve in the left panel has a breaking point around 200 KIAS. Any two points that have an x value of less than 200 KIAS project onto the graph in the right as segments bigger than any two points that have x values higher than 200 KIAS. That is unless you go above 250-275 KIAS, but that's food for a next meal. :)

Bored you enough? Let me make it up to you with some simulator hands on.

I start with a custom mission in which the aircraft is loaded to a gross weight near 35,000 pounds.

The combat payload is the one in the screenshot I showed above at the start of this entry.

I dived to near the ground, controlled my airspeed to around 250 KIAS and started making some turns. I closely watched out the G load indicator, hanging on the left side of the HUD. Trim was to neutral and the throttle totally opened.


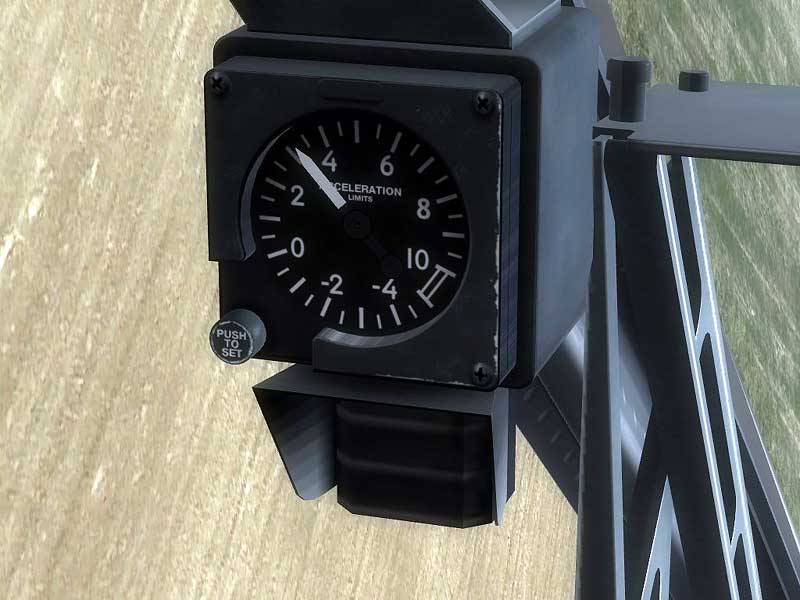
Just as the sustained turn performance curve predicted, if I keep my Gs not higher than 3 Gs, I can make some spiffy turns without loosing too much airspeed (lost around 20 knots after a 360 degrees turn). The only issue I had is getting a hold of the rudder to avoid loosing altitude.


I am delighted to be able to make better turns for my combat maneuvers. I now realize that before I was pulling the stick too much and my Gs too high. At 4Gs the aircraft becomes uncontrollable after just a couple of seconds.

Now, it is unlikely that I will evade a missile with a turn of just 3Gs. All of the above is for sustained turns and not for instantaneous turns. But as I mentioned in the previous paragraph, at least in my hands a 4 Gs turn lasts for just two seconds. Any ideas?

Cheers,

Sunday, October 10, 2010

DCS: A-10C Warthog - Paying to Try Out Non-Finished Goods

Ah, the joys of the brave new world of gaming! The seeker of quality and educational value is driven by a thirst that can only be quenched now and then. So, when the jug that will contain my holy water is offered to me,  I pay through the nose ... just to hold it and to imagine the smell of sweet vapors that are still to come ...


The beta of the highly anticipated DCS: A-10 Warthog can be purchased from Eagle Dynamics' website. The official line is that you are pre-ordering the game and being offered an exclusive beta version while you wait for the release version of the game. Eagle Dynamics said that they want to test the simulator through the widest possible amount of hardware configurations, hence the "open beta" release. Rolling eyes here. Why not being honest and telling me "I want your money now, please". I will give it you at once, I love what you have done in the past, just stop with the silly excuses. 


Considering is a pre-release version, DCS: A-10C Warthog beta is in quite very good shape. Off course there are typos, untranslated briefings, missing sound files (voices), one of the maps is unfinished, worrying framerate issues (around cities and when looking at your wingman) and other quirks. If you are thinking in hoping in and starting a campaign right after installation,  you may want to wait until the full release. 


But let's talk what is really important: this is the first flight simulator that has taken close air support seriously. I almost fell off the chair when the air controller told me "this is a type 3" and followed that with a 9-liner ... I almost cried of joy. There is a screenshot below about this. 


Screenshots are clickeable.


Sunday, September 26, 2010

Falcon 4 Allied Force - Learning from the computer pilots

Word association game ... I throw you a word and you tell me what words come to your mind!

Falcon 4?

My words for Falcon 4 are: "staying power".

This game, in its original or modified form, has been in the hard drive of all the computers I had since 1998. Falcon 4 never ceases to amaze me. The fact that nobody yet could come even close to create something like the fantastic virtual battlefield built around the simulation will likely be the topic of another blog entry, but let me vent some right now. We live in a world where the quality of a simulation is measured in number of polygons and textures. Yet, we still come back to Falcon 4, Close Combat, Combat Mission (the original three) or [insert your oldie here] ... We play them, mod them, resuscitate them from an old operating system. Anything to keep the lights on within some niches that mainstream game development wants filled with dirt. The other day I was talking about this very issue with a reader of this blog: where did creativity go?

Enough digression. Let me share something about a dogfight I had yesterday.

My office has a window to the Balkans.
The "3" key opens a virtual, non clickable cockpit that can be viewed with TrackIR. Great for dogfighting.
No amount of TrackIR goodness is enough to replace bad aerial tactics. In this screenshot I'm looking at my six, keeping an eye on a Mig-29 that is saddling up on me.

This one you will need to click in order to see something. It's an ACMI tape that shows my plane (Viper1) slowly climbing at 197 knots (surely I will get no prizes for energy management) and ready to get some lead from a Mirage 2000. The camera is positioned to my plan'es left and looking down towards the action. Blue lines are altitude poles and the red-green lines are wingtip trails. Note that the Mirage's airspeed (239 knots), a tad higher than mine (197 knots), can result in an overshoot.

The computer controlled Mirage does not overshoot. He pulls up and rolls into my slowly climbing Falcon. This maneuver is similar to the so-called a "high yo-yo", or maybe to a lag pursuit roll. The wing trails in the background show my turn as tighter than the Mirage's one. That explains my lack of airspeed egressing from the turn fight.
Cheers,

Sunday, May 16, 2010

LOMAC Flaming Cliffs 2.0: Close Air Support (Part 4)

This is a continuation from this entry.

We have been cleared hot. This time the JTAC gave us free reign on what ordnance to use, but it is common practice in Type 1 CAS for the JTAC to choose which type of weapon the attack aircraft should use.

I haven't mentioned yet, but there is an SA-11 some 20 km from our target. By the way, I don't know what happened since the latest patch, but the SA-11 is not giving us such a hard time. We keep it real, though, and try to fly low as much as we can.

For our attack run, I used (more or less) the tactics explained by SimHQ's Andy Bush (former A-10 pilot) in this excellent article. We approach low and at the pull up point climb for the final bomb run.

Attention: during the pull up don't let your airspeed to go below 240 knots! In this case, we could only climb to 1,200 ft. My wingman is reporting enemy armor. Just super. Note the RWR; an SA-11 is tracking us.

There is not much diving when you come in from 1,200 ft, so our bomb run goes on from a shallow -20 degrees dive. The target mentioned by the JTAC is the house below the left -20 degree mark in the HUD, but his laser appears to be pointing at a bunch of trees nearby.

The JTAC reports bombs on target, but the house is still standing.


As specified by the JTAC, we exit east towards the CP.

As in real life, from the air we couldn't really figure out if our bombing run was effective or not. We have been tasked with bombing infantry; they are almost invisible from the air. We have to rely in our JTAC for that ... and he bugged out from his position. What's going on down there?

A recording of the mission allows to see all those things we missed because we were busy flying, bombing and staying alive. Below is a sneak peak of what was going on below our wings.

There was enemy infantry around that house. The JTAC may have moved his laser a bit from it ... whatever ... the bombs fell close enough to the enemy position.

During the debriefing, I was informed that our bomb run killed 8 enemy infantry.

Our infantry was relatively close to our target. They started pulling out to the south as soon as we were cleared hot. A smoke column and two aircraft in the far background can be barely seen. That's us.

These infantrymen better hurry up across the river. Enemy armor is approaching the town!

Cheers,

Sunday, May 9, 2010

LOMAC Flaming Cliffs 2.0: Close Air Support (Part 3)

This a continuation of this previous entry.

We left the contact point and we are a few miles short of the initial point ALAMO (IP ALAMO). The chat with the JTAC continues.

Talk to me JTAC ... (laser spot is the green diamond in the HUD)

The "talk-on" is a very common part of type-1 CAS because this type requires the aircraft to have visual tally to where the JTAC wants the ordnance delivered. "Contact" is the brevity code for having visual contact and "spot" is the one for being able to receive the reflected laser signal emitted by the JTAC. I still can't see the target, but moving a few miles forward solves that issue.

I see the target now ... (laser spot is the green diamond in the HUD)

The "readback" is just to make sure that both the JTAC and the attack aircraft are on the same page. The attack aircraft reads back items 4 and 6 of the 9-line brief plus some items from the remarks given by the JTAC.

Once the readback is acknowledged by the JTAC, he clears us for the attack run.

Cheers,

Saturday, May 8, 2010

LOMAC Flaming Cliffs 2.0: Close Air Support (Part 2)

This is a continuation from this previous entry.

We are at the contact point, ready to copy our next CAS mission from the joint tactical air controller (JTAC).

Huh? See text to get even more confused.

"Type 1 in effect"
CAS comes in three tasty flavors (types 1 to 3). Type 1 CAS is used when the JTAC needs to acquire visually both the target and the attacking aircraft. The situation down there must be delicate.

"ALAMO ... 012 .. 11.0 ... etc"
This is the so-called "9-line brief". It has to include these specific items in this specific order:
  1. Initial Point (IP) (ALAMO in this case)
  2. Heading from the IP to the target (012)
  3. Distance from the IP to the target in nautical miles (11.0)
  4. Target elevation in feet above the sea level (325)
  5. Target description (Enemy infantry ...)
  6. Target location coordinates (NB 456746)
  7. Type of target marking (laser in this case)
  8. Location of friendlies form the target (East 400 meters. Sh!t I knew something was kinda pressing down there. Better watch out for where those bombs fall!)
  9. Egress direction and where to go (Egress east and go to the CP again)
"Remarks"
What? There is more? See below, please.

Huh? See text for further confusion.


Final attack headings is almost self explanatory: is a range of headings that you can have while flying to the target. This headings range ensures that you can see the reflected laser radiation and in some cases is used to make sure that we hot-rod pilots remember if there is any fire de-confliction measures in effect (nothing funny about being shot down by your own artillery).

Immediate TOT (time on target), means that we should deliver our ordnance as soon as possible (told you something urgent is going on down there).

"Say when ready for talk on" ... well ... there is a lot of talking in CAS. 

More coming soon ...

Cheers,


LOMAC Flaming Cliffs 2.0: Close Air Support (Part 1)

A boy returned from Sunday school and his mother asked him what he had learned. He said that he heard about how Moses and his people escaped from Pharaoh's Egypt. He told her that as Pharaoh's tanks approached the Israelites, Moses got on the radio and called in an air strike, which knocked the tanks out of action. The puzzled mother asked, "Is that really the way the teacher told the story?" The boy replied, "If I told it her way, you'd never believe it!"

This joke originally appeared in Reader's Digest around 1967 and it is the opening paragraph of "The Warthog and the Close Air Support Debate". The author of this book quoted the joke to make the point that in popular imagination, close air support is a given.

This series of entries are an amateurish attempt to outline how CAS is done in real life by the USAF, using LOMAC Flaming Cliffs 2.0 as a framework. I make no claim of being knowledgeable enough on the topic to provide totally realistic dialogs and comments. Whatever I write here you will find it elsewhere in the web. My only point is that besides the complexity of putting ordnance onto the enemy while flying at 300 knots, in real life there is another layer to it that is quite technical and time-consuming.

We are the US Air Force and we love to bomb ... just not near the battle lines!
This is what we got today. We (a flight of 2 A-10s) have been loitering for a little while before AWACS controllers directed us to a contact point (CP, way point 2 in the map below) and contact Dragon 11.

In the map below you will notice the CP (way point 2, WP2) and three other way points. These other three are pre-planned IPs that both us and the ground controllers know about. Since CAS is dictated by the needs of the troops below, we don't know which of the IPs we will use beforehand. But we will find out when we contact Dragon 11 from the CP (WP2).

Where are the troops in this map? Well, we only know that a US Army Bn is advancing north west and that they are fighting near IP TARAWA. This map should contain some control measures, but I omitted those for clarity. 

When we reach the CP, the following check-in chit-chat takes place.

Huh? See explanation in the text.

JTAC is the joint tactical air controller or more simply put, our ground controller. His callsign is Dragon 11.

During our check-in we say the following about us to the JTAC:
  1. Our Mission Number (ADM5685, this is something we got from the AWACS)
  2. Our Number and type of aircraft (2 A-10)
  3. Our position and altitude (6 digit grid number and altitude in feet ASL)
  4. Our ordnance (2 MK84, 2 Mavericks, rocket launcher)
  5. How much time we have available to be on station
  6. Which type of sensors we have available
  7. The abort code for our CAS mission (DEL, the JTAC will consult a code book that we also have in the plane and check which letter matches "DEL"-that letter is B in this case, so the abort code will be "BRAVO")
More coming in the next entry.

Cheers,


Thursday, May 6, 2010

LOMAC Flaming Cliffs 2.0: Battlefield Loitering in the A-10

One of the most crucial capabilities of the A-10 is it's ability to loiter around the battlefield for hours so it can be available after a few minutes whenever a ground commander needs its firepower.
Even the most hardcore combat flight simmers will stay away from a mission where you have to fly an aircraft for  more than one hour. Me too. Who has the time for that?

Nonetheless, I wanted to see if I could experiment the A-10's loitering capability in LOMAC. So, I took onto the virtual skies in my virtual A-10, loaded with 100% fuel and a spiffy payload for close air support. In this mission that I edited there is an SA-11 battery some 30 km ahead so I started my loitering circular circuit at around 1,000 ft.

How to stay airborne the most time with the least fuel? Stick and Rudder says:

"An airplane will maintain flight with the least amount of power if it is flown quite slowly, very nose-high, with its wings at very high angle of attack.[...] The airplane is not covering distance very effectively, for it is too slow, but if develops perfectly astounding endurance".

I make no claim that I nailed an optimal flight regime for loitering or that I even know the "speed of best duration" of the virtual A-10. But I was mildly surprised with my flight conditions, which I kept almost hands free for a good fifteen minutes (fell asleep on the keyboard).

At this fuel consumption rate, I can loiter for more than one hour and still have some fuel for an attack run and the RTB. 

In the image above, also note how the RWR is quiet. :)

Cheers,


Friday, April 30, 2010

The Red Pill Gives You Wings!

Like the famous energy drink ... :)


A new wave of screenshots and a vignette of what The Red Pill can do are now available at WarfareSims.com.

This time, a JSTAR platform flying along the Saudi border finds a group of enemy tanks and an SA-6 battery. A SEAD flight (F-4Gs) and an AI mission (A-10s) take care of them.


There is war gaming goodness wherever you look at! If you read the original post at WarfareSims.com you will notice the extreme detail in the modeling of sensors. There is even mention of secondary explosions taking out some of the SA-6 launchers (!).

I wonder if there is any type of modelling of neutral vehicles. I bet that at that distance the JSTAR may detect Baghdad's rush hour traffic.

Cheers,

Sunday, April 25, 2010

LOMAC Flaming Cliffs 2.0: Battlefield Air Interdiction at Gudauta (Part 3)

Soon after take off, we get painted by the one of the SA-11s. They should be in the far background.


Navigation. The Caucasus looks all the same from altitude. Rivers played a big role in our navigation.

En route, somewhere between WP2 and WP3. Note the tight space we are in.

At the contact point (CP), waiting for the ground team to contact and clear us. In real life, these CPs may hold you for a long time, so you better trim your aircraft for fuel efficiency.  I checked my fuel consumption and concluded that I could do this for 1.5 hours if needed. CPs around mountains like this may not be a good idea in real life (communications with ground controllers will be a tad difficult).

Once cleared hot, we zoom through the IP. The Death Canyon can be seen here. The SA-11 at the gate of this canyon painted us briefly while we sought refuge on the slopes ahead.

Deep breath nearing WP6. Last glance at ECM, weapons and targeting systems.

The moment of truth. At WP6, we emerge from the mountains and get a panoramic view of the enemy interior lines.

A few seconds later, during our attack run on the SA-11 in the valley (between the urban are and the river). One AGM-65D Maverick launched. No SAMs launched at us, thank goodness ...

This screenshot was made with a replay file, because off course at this point we were breaking hard from our attack run. The SA-11 in the valley goes up in flames.

With the SA-11 in the valley gone, we confidently align for an attack run on the tanks. We get a not-so-friendly reminder form the SA-11 in the coast line about keeping our altitude on check. The missile looses track and self-destructs over the woods.


 We move through the valley with the hills on our right covering us from the other SA-11 in the coast line. Is a tight space, but the A-10 can turn on a dime.

Acquiring targets with low altitude pop ups is challenging and we overshot the tanks during our first pass. They shot at us con gusto, but our serious error didn't have any consequences.

My second AGM-65D finds its target on the first tank. Note how we are breaking too close to the target.

My third AGM-65D misses! Again, we are breaking too close to the enemy.

My fourth AGM-65D. Only one tank left.

I order my wingman to engage the tanks with his missiles, and artificial stupidity kicks in afterburner. He aligns for a text book attack run from high altitude and gets fired at by the SA-11 in the coast line.

No chute, my wingman is dead (explosion in the left).

I then attack the only tank left with all I have at this point, the gun ...

Multiple passes, no results. In this image, a gentle slope made it impossible to put the tank into my sights. Low altitude gun runs suck ...

Another failed gun run with a shallow angle. I just can't pop up because of the SA-11 on my right. Flying over the target is not a good idea either.

I even tried changing the direction of the gun run. After some hits, the T-80 proved to be a tough nut to crack. Now he is getting too close to the front lines. With my guns dry, I RTB.

Landing at the forward base Sukhumi. Not a good day for our wing. A worse night for the troopers on the ground ...

Cheers,